Locations
Introduction
A location in the CoolSens system is a logical organizational unit that represents where devices are located. It can be:
- a single pharmacy,
- a hospital ward,
- a laboratory,
- a warehouse,
- any other facility or dedicated area requiring temperature or humidity monitoring.
Default location
All devices must be assigned to a specific location. When registering and creating an account, the first location is automatically created. Its name and optional description must be completed after the first login to the system and filling in the account data.
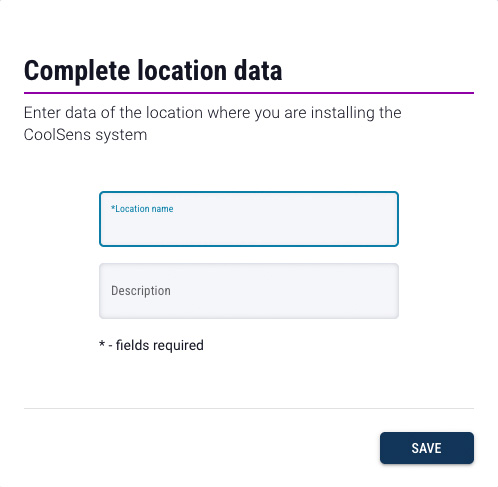
All newly added devices will be assigned to this default location until the User creates new locations, at which point a wider selection will be available.
Showing and hiding the locations panel
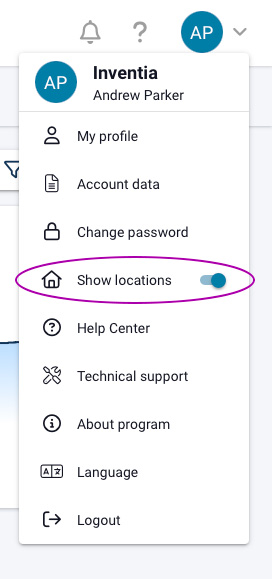
If the locations panel is not visible, in the top menu available after clicking on the avatar in the upper right corner of the program window, select the option Show locations.
In the event that the visibility of the locations panel is unnecessary, you can always hide it by turning off this option.
Location panel functionality
The location panel is used to manage locations and filter platform resources by a specified location. Users can:
- add new locations,
- edit existing locations,
- delete locations,
- toggle active location.

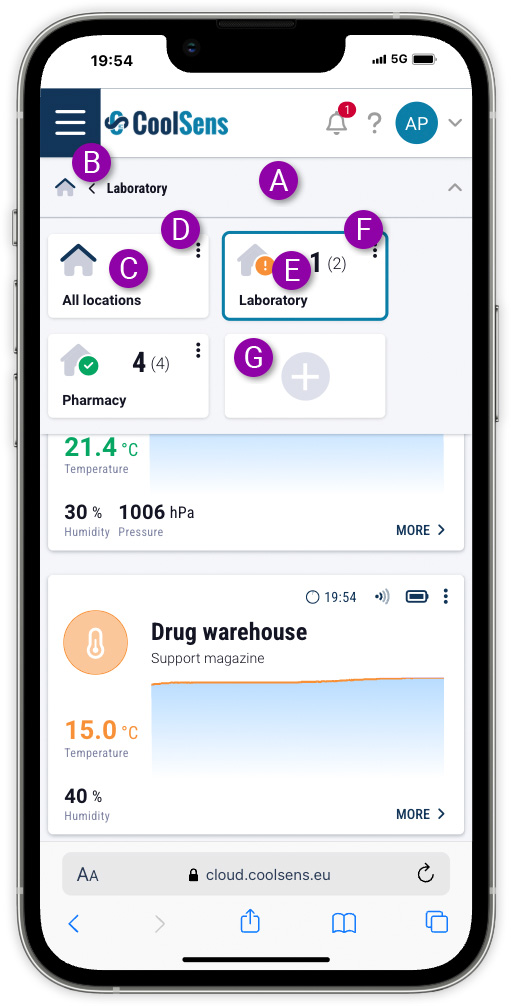
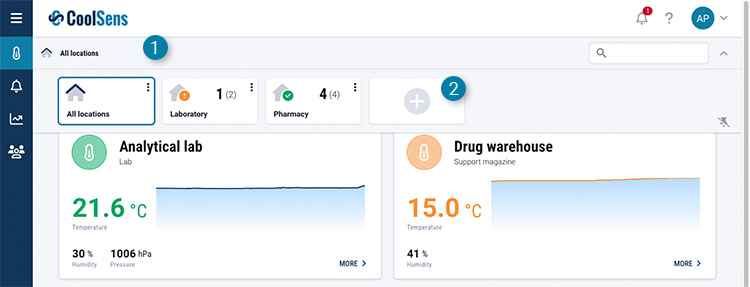
- Location panel header – clicking it expands or collapses the panel with tiles representing locations.
- Navigation path – indicates whether and which location has been selected by the User and allows for a quick return to displaying all locations – simply click the house icon or the All locations link.
- Location Search – this field allows you to filter the list of displayed tiles to only those that meet the entered search criteria;
- All Locations tile – clicking it removes the filter with the previously selected location.
- Show list of locations – Clicking the three-dot button on this tile will display a list of all your locations for easy management.
- Location tile – represents a single location, displays the name of the location, the status of devices operating in the location and their number (total and the number of devices with the indicated status); clicking the tile will change the active location.
- Show location details – clicking the three-dot button on a location tile will display a window with its detailed information, where you will also be able to edit or delete the indicated location.
- Add Location – click this button to go to the new location creation form.
- Pin the locations panel – the locations panel is minimized by default after selecting the selected location, if you want the panel to remain visible to quickly switch between locations, click this pin icon; if you check this option, you will be able to hide the panel after clicking its header.
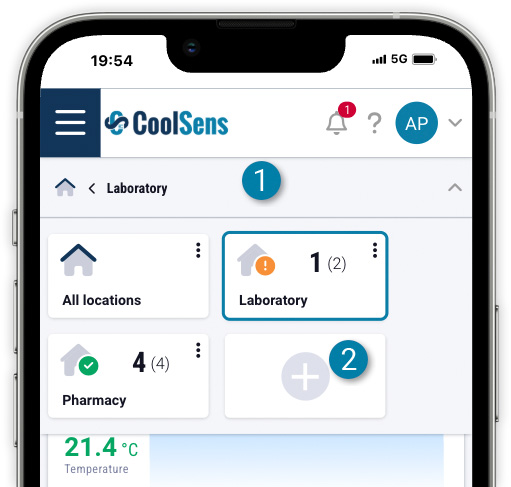
- Location panel header – clicking it expands or collapses the panel with tiles representing locations.
- Navigation path – indicates whether and which location has been selected by the User and allows for a quick return to displaying all locations – simply click the house icon.
- All Locations tile – clicking it removes the filter with the previously selected location.
- Show Locations List – Clicking the three dots button on this tile will display a list of all your locations for easy management.
- Location tile – represents a single location, displays the name of the location, the status of devices operating in the location and their number (total and the number of devices with the indicated status); clicking the tile will change the active location.
- Show location details – clicking the three-dot button on a location tile will display a window with its detailed information, where you will also be able to edit or delete the indicated location.
- Add Location – click this button to go to the new location creation form.
Location tile
The tile representing a location contains its name, status, and the number of devices with the indicated status, as well as the number of all active devices (devices that are deactivated or not paired with the hub are omitted here).
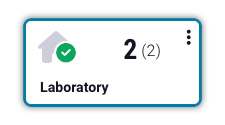
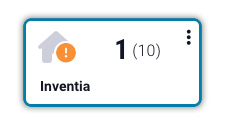
A green icon means that all devices in a given location have parameters within the norm – they remain within the established temperature and humidity ranges. Both numbers will be the same and will indicate the total number of (active) devices in the location.
Orange icon indicates a warning status – at least one device in the location has exceeded the set temperature or humidity warning level, or has a low battery. The number before the bracket will indicate the number of devices with a warning status, the number in the brackets will indicate the total number of (active) devices.
Red icon indicates an alarm state – at least one device in a given location has exceeded the set temperature or humidity alarm level, or has a critically low battery. The number before the bracket will indicate the number of devices with alarm and warning status, the number in brackets – the total number of (active) devices.
Active (current) location
Filter - selection of multiple locations
If we want to indicate resources from several locations, the filtering functionality comes in handy (we cannot use the active location for this, because there can only be one).
Click the FILTER button visible above the devices or alarms. In the tree, select the locations whose resources you want to display. Hide the filter panel by clicking the collapse button in the upper corner of the filter panel or clicking anywhere outside the panel.
The red color of the label on the FILTER button means that some items have been selected in the tree and the displayed resources may be incomplete.
Selecting an active location in the location panel also clears all filter settings.
Adding a location
- Expand the locations panel by clicking on its header (if the locations header is not visible, see above to enable it).
- Click the “+” button to add new locations.
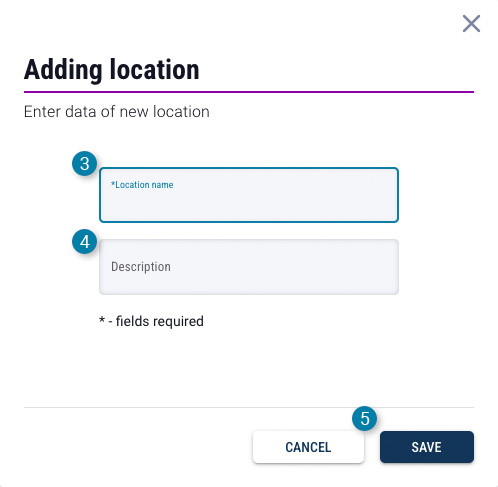
- Enter a Location Name (required field).
- Enter an optional Description – this can be any text, such as the address of the facility.
- Click the Save button to add a new location.
List of locations
The list of locations makes it easier to manage them and select locations when there are a large number of them in the account.
To view the list of locations, expand the panel with locations and on the All locations tile, click the button with three dots.

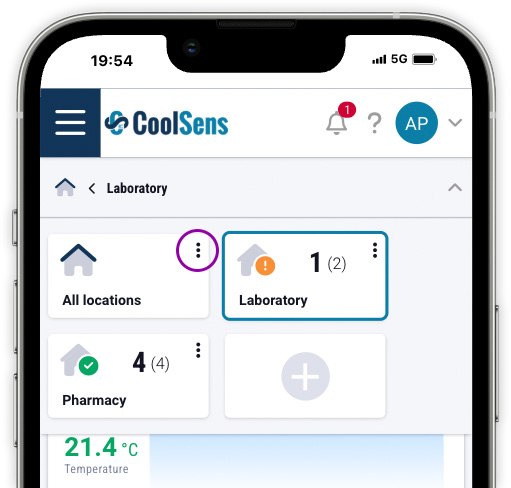
A window will appear listing all locations.
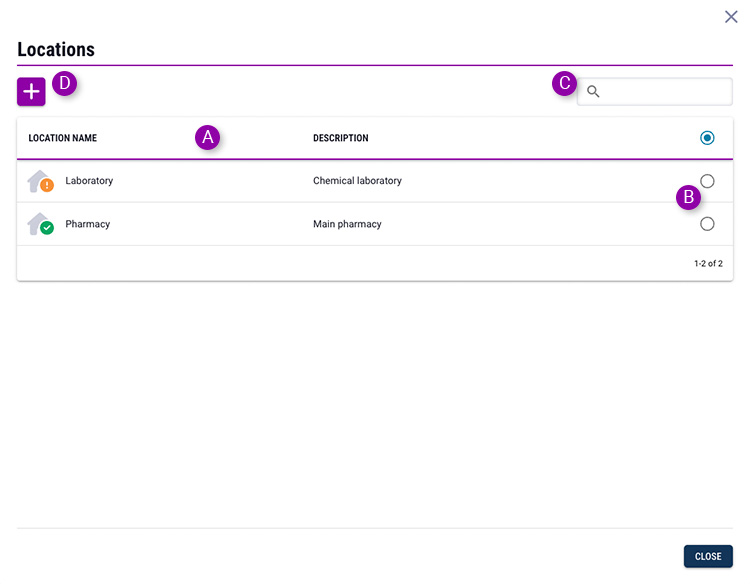
- Table with Name of the location and its Description.
- Switch allowing you to select the active location – after clicking the switch in a given row with the location, or to select all locations after clicking the switch in the header of the column with locations.
- Field used to search for locations on the list.
- Button for adding a new location.
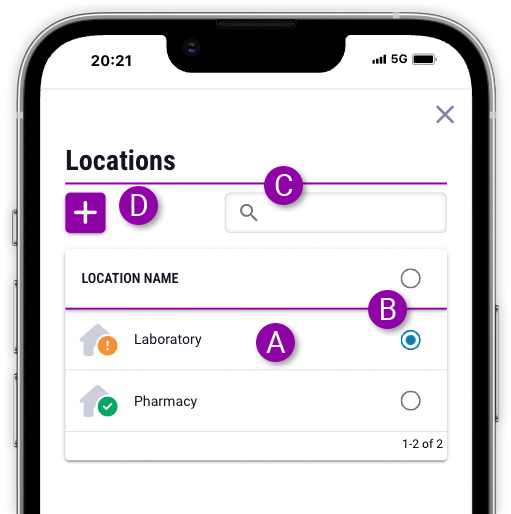
- Table with Name of the location.
- Switch allowing you to select the active location – after clicking the switch in a given row with the location, or to select all locations after clicking the switch in the header of the column with locations.
- Field used to search for locations on the list.
- Button for adding a new location.
Editing and deleting locations
To edit an existing Location, display its details window by clicking the more button in the upper right corner of the location tile.

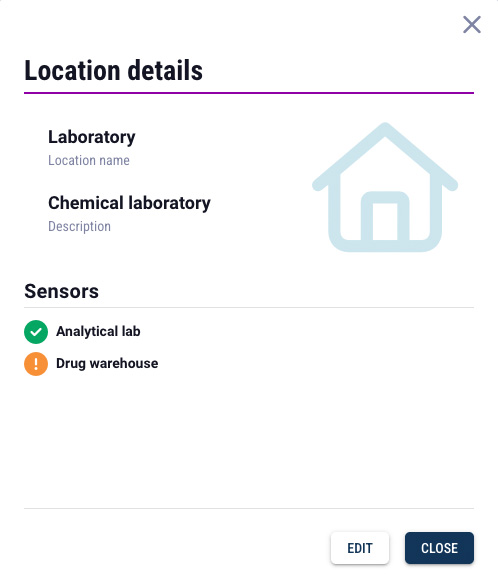
Click the Edit button (visible to location administrators) to edit the Location.
The Delete button, visible after entering the Location editing mode, allows you to remove the Location from your account.
Assigning devices to locations
Each device in the CoolSens system must be assigned to one of the locations. When creating an account, the first location is created and the first device is assigned to it. Subsequently added devices are automatically assigned to this location.
When adding another location to the account, the User is given the option to select the location to which the newly added device is to be assigned.
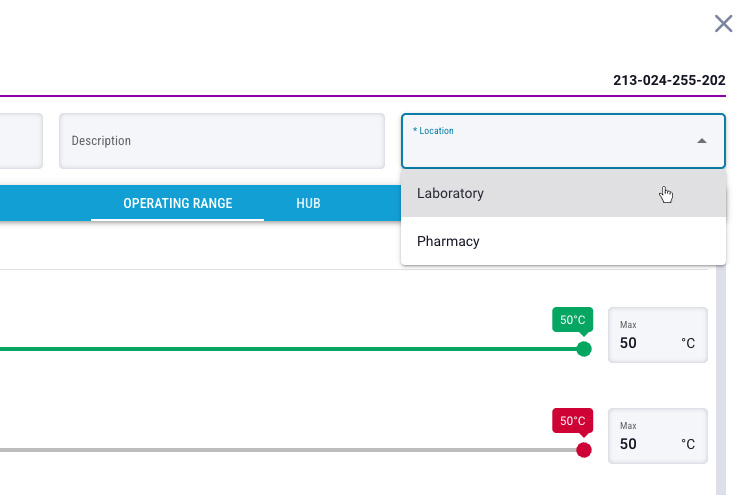
When filling out a new device’s details, select the location you want to assign the device to from the drop-down list in the upper right corner of the device add form.
Moving devices to other locations
To move devices to another location, please remember the following rules:
Moving the hub
To move a hub (and its paired sensors) to a new location, follow these steps:
- Log in to the app and view the device dashboard.
- View the details of the selected hub (by clicking the MORE button on the device in the tile view, or by clicking the row with the device in the table view).
- Click the CHANGE LOCATION button that appears after expanding additional options using the Expand
 button at the bottom of the device details window.
To move a hub (and its paired sensors) to a new location, follow these steps:
- Log in to the app and view the device dashboard.
- View the details of the selected hub (by clicking the MORE button on the device in the tile view, or by clicking the row with the device in the table view).

 Click the button with the suitcase icon that appears after expanding additional options using the Expand button at the bottom of the device details window.
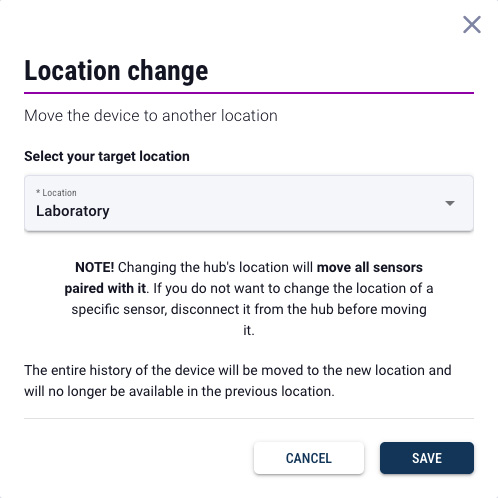
- Select the target location to which you want to move the hub and sensors.
- Confirm your selection by clicking the SAVE button.
Moving the sensor
To move a sensor to another location, follow these steps:
- Log in to the app and view the device dashboard.
- View the details of the selected sensor (by clicking the MORE button on the device in the tile view, or by clicking the row with the device in the grid view).
- Make sure the sensor is disconnected from the hub. If it is not, go to the device configuration and disconnect the hub (for more information, see Sensor configuration).
- Then click the CHANGE LOCATION button that appears after expanding additional options using the Expand button at the bottom of the device details window.
- Select the target location and click the SAVE button to confirm the changes. Remember to pair the sensor with the correct hub in the new location.
Assigning a location to a User
The account administrator always has access to all locations, but A user must be assigned locations to which they should have access. For more information, see User Management.